
How to Use the Tiny Eye Add-On in Blender
The Tiny Eye add-on for Blender is an incredibly useful tool for creating detailed and customizable eyes for characters. This blog will guide you through the process of installing the add-on, adding it to your project, customizing it, and baking the textures. Additionally, we'll discuss the advantages of using this free add-on and how you can support its developer.
Installing the Tiny Eye Add-On
1. Download the Add-On: First, download the Tiny Eye add-on from the Blender Market or any other trusted source where it is available.
2. Install in Blender:
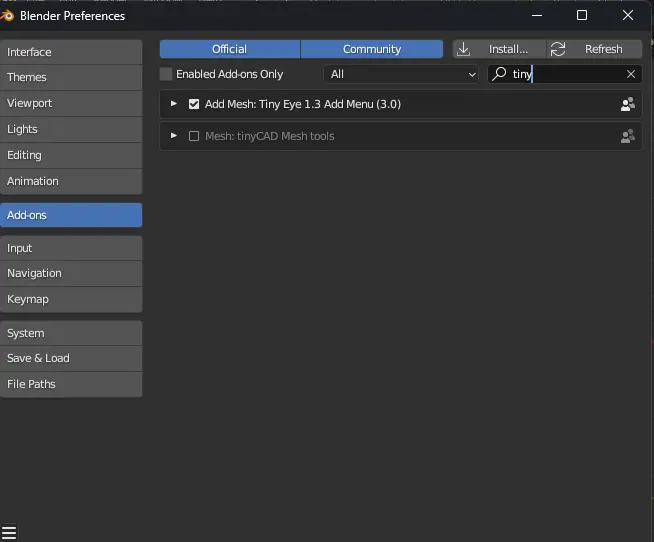
- Open Blender and go to Edit > Preferences.
- Select the Add-ons tab and click on Install....
- Navigate to where you downloaded the Tiny Eye add-on, select it, and click Install Add-on.
- Once installed, ensure the checkbox next to the add-on is ticked to enable it.
Adding Tiny Eye to Your Project
1. Access the Add-On:
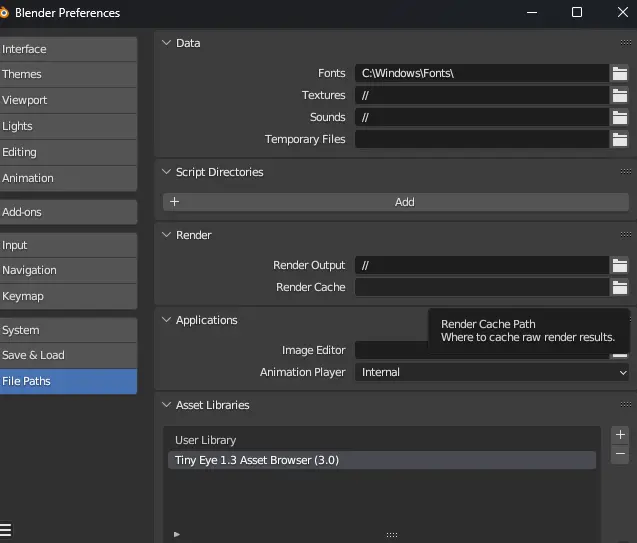
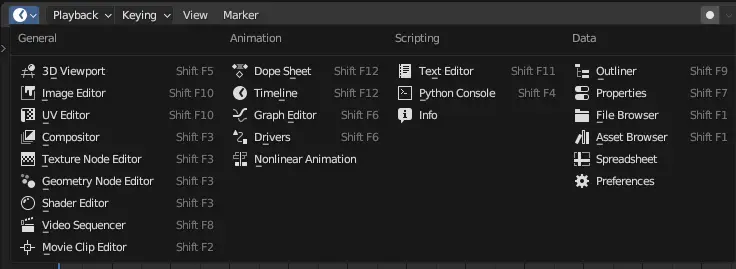
- Go to the 3D Viewport.
- Find the Asset Library in window selection.
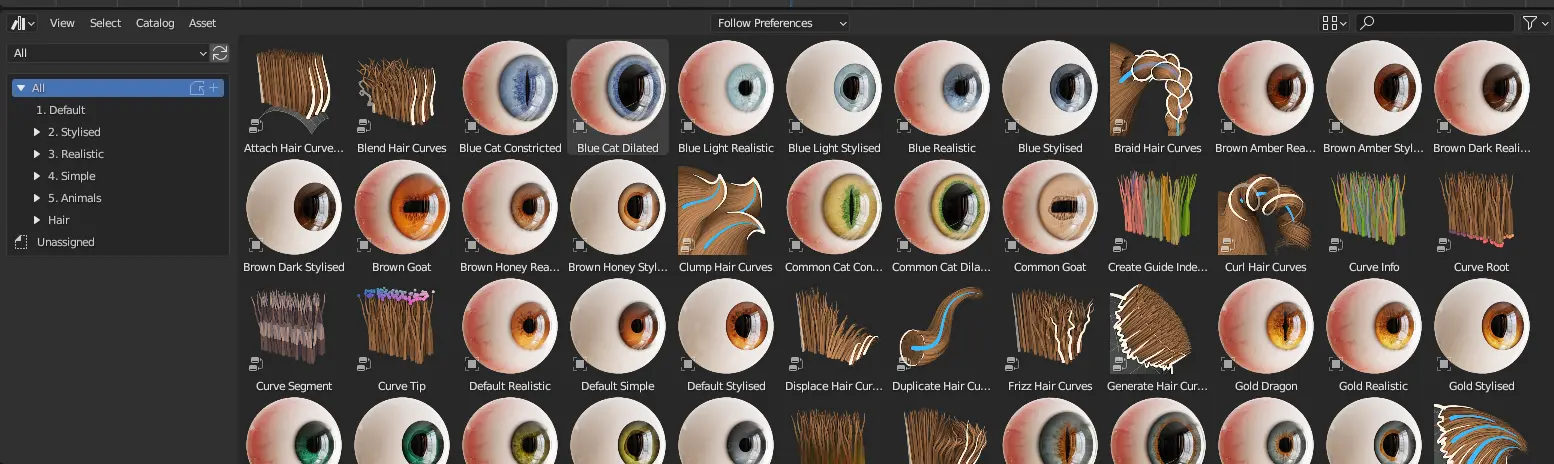
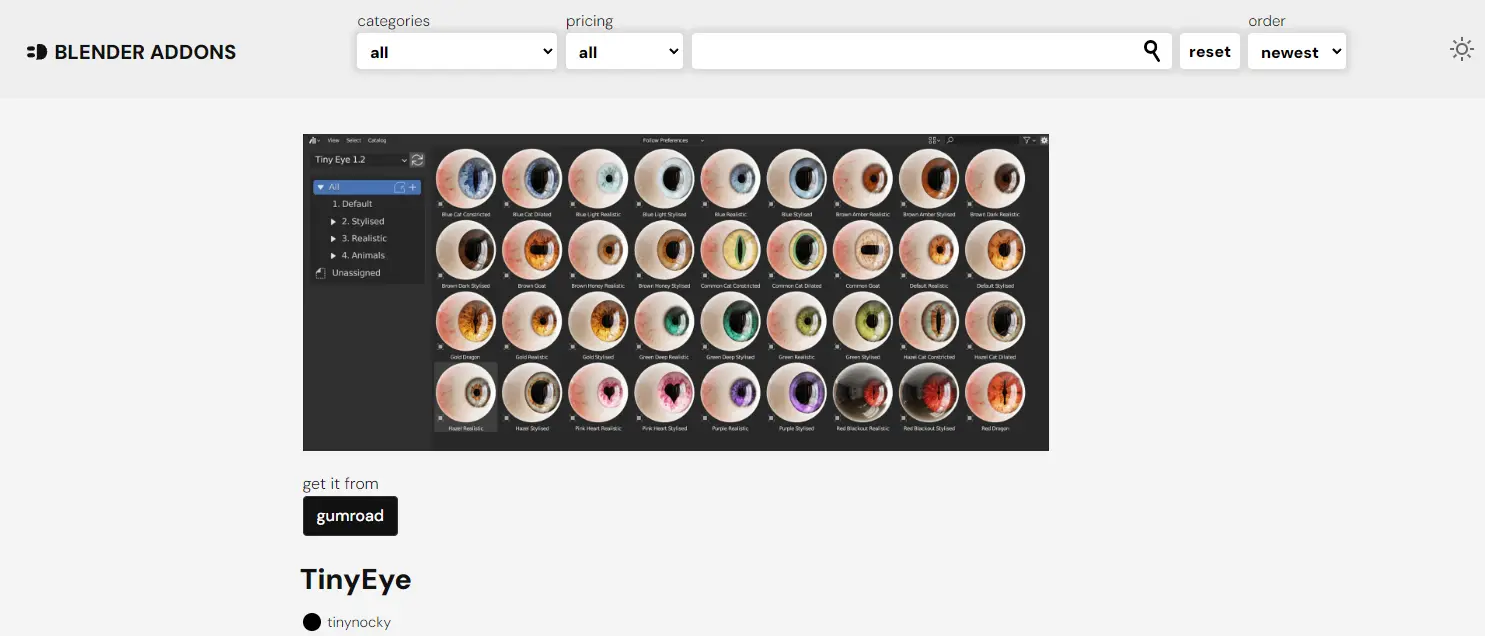
2. Add Eyes:
- Drag and drop a preferred eye from the tab to your scene .
- This will add a new eye model to your scene, complete with separate materials for the iris and sclera.
Getting Tiny Eye into the Workspace
1. Positioning:
- Select the eye object in the 3D Viewport.
- Use the G, R, and S keys to move, rotate, and scale the eye into place.
2. Duplicate for Both Eyes:
- If you need two eyes, you can duplicate the existing eye object (Shift + D) and position the duplicate accordingly.
Customising Tiny Eye
1. Changing Colors and Materials:
- With the eye selected, go to the Materials tab in the Properties panel.
- You'll see two material slots: one for the iris and one for the sclera.
- Select each material and adjust the color, roughness, and other properties as desired.
-You can adjust the shape-keys according to your preferences and apply them, and also within the shader tab you can customize colors, roughness,etc.
2. Adjusting Styles:
- The add-on provides options for different styles (realistic, stylized, etc.).
- These can be accessed from the Tiny Eye tab in the side panel. Adjust the settings to fit your desired style.
Baking the Textures
Baking textures for Tiny Eye involves multiple steps due to the complexity of the materials. Here’s how to do it:
1. Set Up the UV Maps:
- Ensure you have two UV maps: Bake Iris UV Map and Bake Sclera UV Map.
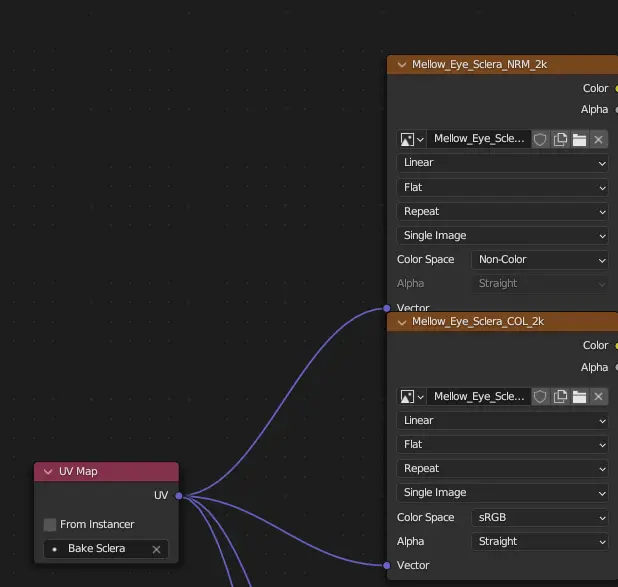
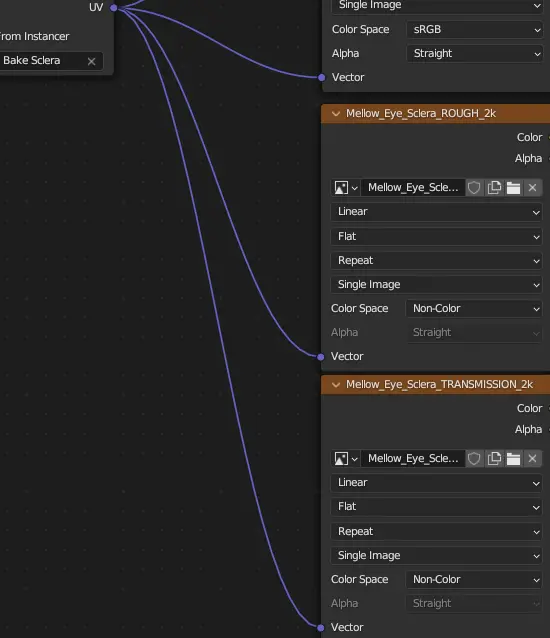
2. Baking the Sclera:
- In the Shader Editor, ensure the material for the sclera is selected.
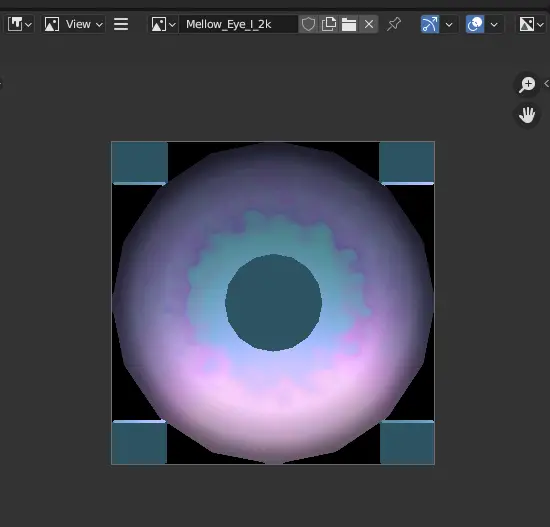
- Add an Image Texture node and create a new image. Name it something like Sclera_Bake_Roughness (Give different names for each image texture)
- Set the image node to Non-Color data for roughness, transmission, and normal maps. And for the Sclera color set the sRGB option in Color-Space.
- In the Render Properties tab, open the Bake section. Make sure Cycles selected.
For the sclera color texture, make sure the bake type is set to Normal. And hit the Bake. (Always make sure the necessary image texture node, eye material, and the correct uv map is selected before hit on bake)
- Make sure the bake type is set to Emmit for the rest of the baking. Click Bake and repeat for transmission and normal maps, saving each bake to the corresponding image.
- Connect each image texture node’s vector input to the Bake Sclera UV Map.
3. Baking the Iris:
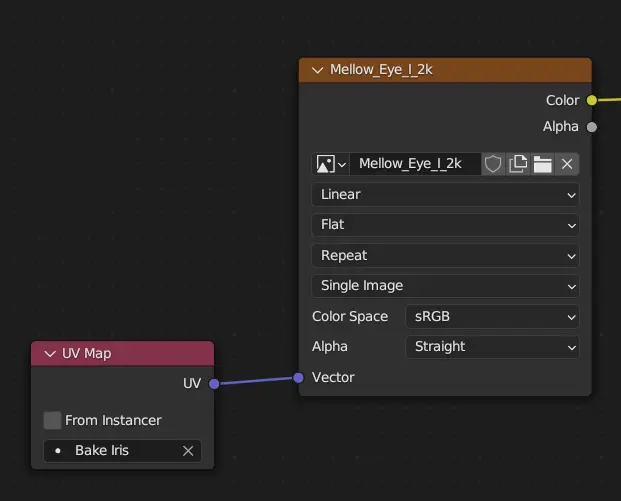
- In the Shader Editor, ensure the material for the iris is selected.
- Add an Image Texture node and create a new image. Name it something like Iris_Bake.
- Set the image node to sRGB for color baking.
- Connect the image texture node’s vector input to the Bake Iris UV Map.
- In the Render Properties tab, set the Bake Type to Emmit .
- Click Bake to bake the color and save the image.
4. Connecting the Baked Textures:
- After baking, replace the procedural textures with the baked images.
- For the sclera, use the baked roughness, transmission, and normal maps.
- For the iris, use the baked color map.
Exporting the Textures
1. Save the Baked Images:
- In the Image Editor, ensure each baked texture is selected.
- Go to Image > Save As... and save each image in your desired format (e.g., PNG).
2. Apply the Baked Textures:
- In the Shader Editor, replace the procedural nodes with the baked texture nodes.
My Experience with Tiny Eye
Using the Tiny Eye add-on has been a game-changer for my workflow in creating eyes for characters. The customization options are vast, allowing for changes in color, roughness, and style from realistic to stylized. This flexibility is particularly beneficial for developing characters for my upcoming game, where each character needs a unique and captivating look.
The ability to easily adjust and bake textures speeds up the process significantly. While the baking process can seem complex, the end result is well worth it, providing high-quality textures that enhance the visual appeal of the characters. Tiny Eye is a great asset for anyone looking to streamline their eye creation workflow in Blender.
The Advantage of Free to Use
One of the most significant advantages of the Tiny Eye add-on is that it is completely free to use. This makes it an accessible tool for artists and developers at any level, from hobbyists to professionals. If you find the add-on valuable and want to support its development, you have the option to donate to the developer. Supporting the developer not only helps them continue to improve and update the add-on but also contributes to the thriving Blender community by enabling the creation of more high-quality, free resources.
In summary, the Tiny Eye add-on is a must-have tool for Blender users. Its flexibility, ease of use, and the fact that it's free make it an indispensable resource for creating high-quality eye textures. Don't hesitate to try it out and consider supporting the developer if you find it as beneficial as I am.
Happy blending!